
I have a confession to make. I am no chef. I wouldn’t even say that I cook. That’s my husband’s role. I bake. I love to bake. I could hang in the kitchen all day long with my oven on. So, when I decided I wanted to play the role of doting housewife and have dinner on the table for my husband (ok, at least once in awhile—he still does the majority of the cooking, and often helps me with the savory recipes you see here on Country Wife Chronicles), I knew that an oven-based dish would be the way to go.
I’m no good at watching multiple things on the stove or bringing more than one dish to the table all at once. A casserole just feels like a no-brainer. I can prep all the ingredients, pretty much whenever I have time, and just throw them together in a single dish; pop it in the oven, prepare a couple side salads, and voila…dinner is done. Even I can handle that. On a good day. On a not so good day…well, let’s just say it’s a good thing my man loves himself a tuna sammy.
So that brings me to today’s post, Chiles Rellenos Casserole. As you probably know by now, if you’ve read any of my previous posts’ disclaimers, I’m a recipe masher. I mash together various recipes to create my own spin on things. I guess I’m creative in that way. I also love to turn anything—and I mean anything—into a casserole. I’ve never met a casserole I don’t like, and I’m a firm believer that any recipe can be turned into one with a little forethought and creativity. I guess that’s the recipe masher in me, I just like to shove things together and see what happens. And thus far, fingers crossed, I haven’t had too bad of luck in doing so.
Take the Chiles Rellenos Casserole, for instance. You can find some other recipes for this concept out there, but the premise remains the same. Take a dish that usually stands alone and turn it into a casserole for a crowd. So, let’s get right to it.

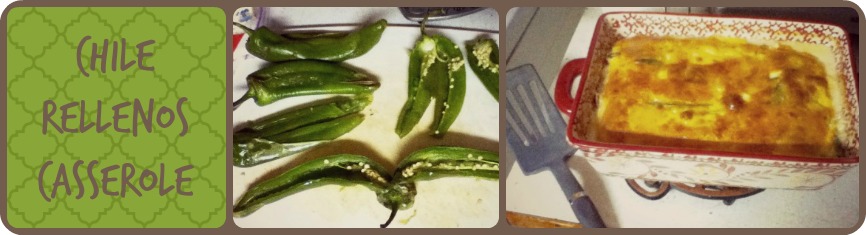
First things first, you need to roast and sweat some Poblanos. Once they are cool enough to handle, you should be able to slide off their skins pretty easily. Then you can halve them and remove their seeds.

Next up, you layer the chiles with American cheese (which is such a perfectly, melty cheese) in your casserole dish. (Hint: It’s perfectly fine to eat some of that creamy, tangy cheese while you are at it!)

Now whip up the egg mixture to pour over the top of the pepper/cheese layers in your casserole dish.

Ok, here is a really important tip, and I swear I’m not sharing out of experience with this or anything (wink, wink)…Do yourself a favor and place the casserole dish on the baking sheet in the oven before adding the 1/2 inch of water to the tray to help steam this dish in the oven. It takes some legit skill to be able to move the tray with the casserole dish and standing water on it into the oven without spilling. Just sayin’…
At this point, could probably just eat the warm, gooey goodness, but it really is better if you add the tomato sauce on top.

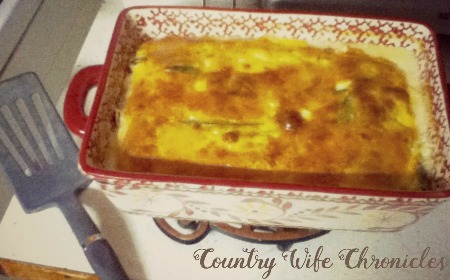
And this picture so doesn’t do it justice, my apologies. Add a quick packet of Spanish or Mexican rice and some canned refried beans as extra sides and boom, dinner is served.
Be Still & Know…


- 6 Poblano chiles
- 5 eggs
- 2 cups milk
- salt & pepper
- 1/2 tsp. paprika
- 1/4 tsp. cayenne
- 1 Tbs. flour
- white american cheese slices
- equal parts butter and flour
- 1 can of tomato sauce
- Roast chiles in the oven until their skin starts to brown and wrinkle. Take the chiles out of the oven and place them in a zip-top bag to steam themselves while they cool for 10 minutes. After the chiles have sweated in the bag and are cool enough to handle, take them out and slide off their skins. Now halve the chiles and remove the seeds.
- Whisk together the eggs, milk, salt and pepper, paprika, cayenne, and tablespoon of flour.
- Lay some of the peppers flat to cover the bottom of a small casserole dish and top them with cheese slices. Follow with another layer of peppers and another layer of cheese slices.
- Pour the egg mixtures over the top of the peppers and cheese and top with one more additional layer of cheese slices.
- Set the casserole dish on a baking tray and place in the oven. Carefully fill the tray with 1/2 an inch of water and back at 325° for 30 minutes.
- While the casserole is baking, mix together a roux with the flour and butter in a small saucepan. Once the roux has reached a nice golden color, add in the can of tomato sauce and stir together. Let the sauce thicken up a bit and the flavors meld while the casserole continues to bake.
- After 30 minutes, check on the casserole; it should be golden brown on top and losing it's jiggle. If it's not quite there yet, go ahead and pour the sauce over the top and continue to bake for another 15 minutes. If the casserole look done initially, go ahead and pull it out and top with the hot tomato sauce from the stovetop before serving.