So, you may recall from earlier posts here on CWC that gardening is not really my thing…I’m just not a gardener.
You can catch up on a little bit of my gardening experience here.
I have to give Wildland Man full credit for any gardening experience I do have and any crops we are able to harvest.
But, I tell you what; I’m learning to like it. Heck, I may even be falling for gardening. Only time will tell.
I liken it to how I became comfortable in the kitchen and began to like cooking and baking.
I guess, now that I think about it, both the kitchen and the garden have always been Wildland Man’s domain. Now I’m encroaching on both. Hope he doesn’t mind.
Anyway, since the previous posts here on CWC for the past few weeks have been all about our garden pallet projects I decided I’d share some basics on herb gardening for my fellow newbies out there.
An herb garden is really a great way to get started gardening. They are pretty low maintenance, grow fast and are ready-to-use in the kitchen. I feel like they are the garden’s version of immediate gratification.
And heck, if I can keep them alive, that’s saying something.
Plus, once you’ve grown your own herbs and used them in your recipes, there really is no turning back.
Fresh herbs are where it’s at.
Fresh herbs grown by your own two hands are even better.
Suggested Herbs for Beginner Gardeners
When selecting what herbs you want to plant, think ahead to what you like to cook and which herbs you tend to gravitate towards in the kitchen. You want to grow something you will use and enjoy.
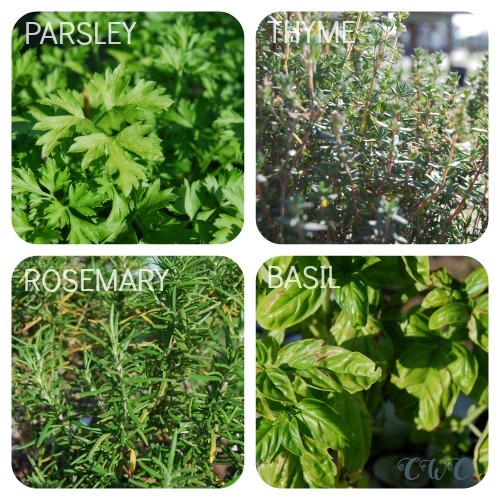
This year, the herbs we planted are:
I also like to choose fun varieties of the herbs we plant, if you check out a garden center or nursery you will likely run into different varieties. In the past, we’ve planted chocolate mint, Thai basil, and lemon thyme to name a few.
If you are looking for some other starter herb garden suggestions, here’s a few links I’d recommend:
- “Best Herbs for Beginners” by P. Allen Smith
- “How to Start an Herb Garden” by The Tasteful Garden
- “17 Easy-to-Grow Herbs” by Better Homes & Gardens
Location, Location, Location
The next thing you need to think about once you’ve selected which herbs you would like to grow is where to plant them. You can plant them in a container or in the ground; it really is up to your personal preference and availability of space.
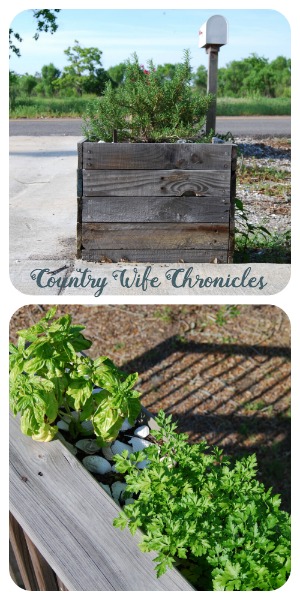
Herbs do quite well in containers, which I prefer as a newbie. Then I have the option of moving them around a bit if didn’t choose a prime location to begin with.
As far as location goes, sunshine is the most important thing to consider. Just be sure to read the labels of your herbs to see if they are sun loving or if they prefer part-sun. Then take a minute to see what options you have for location and sun availability.
Keeping Them Alive: Planting & Watering
Now that you have chosen which herbs you want and you know where to plant them, it is time to get these puppies growing!
Planting is pretty simple.
First, loosen up the soil a bit where you intend to plant the herb. Now dig a small planting hole, about twice the width of the root ball and as deep as the container the herb was in when you purchased it.
Then, take the herbs out of the container you purchased them in, loosen up the roots a bit and place in the hole you pre-dug. Gently pull the soil back in around your newly planted herb. If you are planting more than one herb in the same container, just be sure to leave ample room for them to spread out and grow.
For those of you that are visual learners like me, here are a few links that illustrate the process of planting herbs a bit better than I can explain in words:
- “How to Grow Herbs in Containers for Beginners” by Learn to Grow
- “How to Plant a Herb Pot” by WikiHow
- “Loosening, Teasing or Tickling the Root ball of Plants” by Marie Iannotti at The Spruce
- “The Root of the Problem” by Renee Adam at Bonnie Plants
I should mention that there is a science to planting different herbs together. Some like to be next to each other, others don’t. Some need a bit more water than others. And of course, not all herbs have the same affinity for sunlight.
Here is some information I found online about which herbs work best together:
- “Which Herbs Grow Best Together” by Kayla Matthews at Mother Earth News
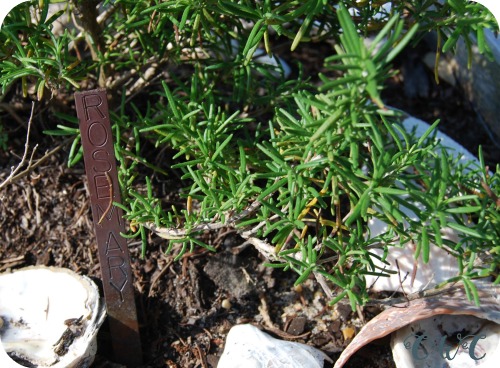
So if you are truly a newbie at gardening as I am, then you’ll definitely want to add some markers to your herb garden. One, because you may not know your plants all that well and it will make them easy to identify when you need something for a recipe. And two, because they are so darn cute!
These copper herb markers were a gift from Wildland Man. He ordered the copper strips, cut them to size and hand stamped them for me. All for our 7th wedding anniversary. It seems there is a romantic side to Wildland Man after all. You can get the full story on these herb labels in my DIY Pallet Planters {Part 1} post.
Of course, Pinterest has a plethora of ideas and you can always check out what I’ve pinned on CWC’s Garden & Harvest board.
Or get creative and come up with something new!
Now that we’ve covered the basics, we need to discuss watering. I know this is a simple concept for some. But for us non-gardeners, it can be the demise of our crops. Too much. Too little. Either way, your herbs may not survive if you don’t get the watering gig figured out.
Here’s some lessons I’ve learned along the way:
- Not all plants need watered every day. It is a water-as-needed kind of relationship. Some plants prefer it a bit drier, others like the moisture. But few like to sit in pools of water. Just sayin’. When in doubt, stick your finger in the soil and see if it is still damp or not before you decide to water.
- It is better to water less often and more thoroughly than to water more often and less thoroughly. Case-in-point: I’m pretty sure that back when I was watering my mom’s plants every day as a kid, I just got everything wet and moved on. And I probably watered at the hottest part of the day, so most of that moisture evaporated leaving very little to actually soak into the soil and get to the roots. I’m certain mom’s plants would have faired much better had I just watered them thoroughly every couple of days than to just dampen them every single day.
- Water at the base of the plants, they don’t need an imitated rain shower (am I the only one that likes to do this with a spray nozzle?). Plants can sometimes get funky when they are always getting wet. Obviously when it rains naturally, this will happen, but when you are watering you can control how wet the plant actually gets. So keep the moisture evenly distributed around the base of the plant, not on top of it. (I did not heed this advice in the photos above. Oops. It was prettier to photograph the droplets on the plant. Sorry plants.)
- It takes time for water to soak into the soil. It is better to water your plants a few times in one watering session than to just hit each plant once. Water one plant thoroughly and move on to the next one. After that water has had a chance to soak in a bit, go back and water them all again. Since you are more than likely not watering every day, you want to hit your herbs with a larger quantity when you actually do take the time to water.
Herb Harvest
Ah, harvest…the best thing about gardening for sure. You finally get to reap the rewards of your labor.
To keep your herbs lasting a bit longer, you want to be sure to not harvest too early, giving them a chance to grow a bit and mature. You also don’t want to kill the plant with your first harvest! To be able to use the herb all season long, don’t take too much off at one time (generally no more than a third of the plant at any one time, less is probably better if you can get by).
Another tip to prolong herbs is to keep them from flowering and seeding out. Just keep an eye on them when you water and pinch off any flowers or cut back any seed heads that are beginning to develop. This should prolong your harvest a little longer and even create a bit more growth on some herbs.
Now it’s time to have some fun developing recipes and coming up with ways to add fresh herbs to all your dishes! The possibilities really are endless.
Here are some recipes from CWC that would be pair well with the addition of fresh herbs:
- Gluten-Free Nectarine Galette could pair nicely with some fresh mint.
- Mexi-Style Breakfast Hash would be amazing with some fresh cilantro. But you could really go with any fresh herbs and change the flavor palate a bit. Take it from a Mexican hash to an Italian with basil. Give it some rustic flavor with rosemary and thyme. And of course, parsley goes great with any dish as a fresh finishing touch.
- Chile Rellenos Casserole or One Tamale, Two Tamale Casserole would be great with cilantro or parsley.
- Quick Delish Pasta Dish could be jazzed up with fresh rosemary, thyme, basil, and/or parsley.
Here are a few other herb harvest recipe ideas worth checking out:
- “How to Harvest and Use Fresh Basil from Your Garden” by Julie Day at Today’s Home Owner
- “Cooking with Herbs” at Mother Earth Living
- “Cooking with Fresh Herbs” at Midwest Living
There are so many ideas out there for herb gardening. I really feel like I just barely skimmed the surface with these basics I discussed in this post.
I hope I kept things simple enough to not overwhelm any newbies out there. Because, I feel you. Gardening has been a learning curve for me. But I want to encourage you to give it a try, and a small herb garden is a great first step.
And just so we are clear, if I can do, you can do it! So, come on, there’s still time, get out there and try out some herbs this summer!
Join in the conversation by commenting at the bottom of the page:
Do you feel inspired to try out an herb garden this year? What herbs would you like to try out?
What do you feel is holding you back from getting into gardening?
What recipes are you thinking of that you want to be able to add your own fresh herbs to this year?



I read the article about harvesting basil. Freezing the leaves in ice cubes for dropping into soup sounds like a really good idea for many herbs. I learned the hard way that when you harvest garlic and hang it up to dry, hang in a barn or somewhere away from your house–definitely not the garage or basement! Thanks for the information!
I’ve heard freezing herbs in butter or olive oil is a great idea, but have yet to try it. Wildland Man wants to dry our herbs this year… Good call on the garlic tip 🙂 Although, Wildland Man would probably be content with it in our house. He LOVES garlic. He even eats it plain as a snack!!! Guess I’m used to the stink by now… Thanks for reading and for sharing…